What the process of implementing a 3D configurator looks like – step by step
More and more manufacturers and retailers are choosing to implement a 3D configurator — not only in the technology or automotive industries.
This tool allows customers to see a product in real time, customize it to their needs and get a feel for it before they even click “order.”
Many entrepreneurs know they would like to have such a system, but don’t quite know where to start.
What kind of data is needed? Do you need to have 3D models ready? How long does it take? Who on the company’s side should participate?
In this article you will find a practical description of the entire process of implementing a 3D configurator – from the first idea, through the preparation of data and models, to the publication and development of the finished tool.
Without technical jargon, but with specifics that will allow you to realistically assess how such a solution can work in your company.
💡 Is a 3D configurator the solution for your company?
Not every company needs a 3D configurator – but many lose out if they don’t analyze their product from this angle.
Before you decide to implement one, it’s worth checking whether your sales processes would actually benefit from an interactive product presentation.
Ask yourself some simple questions:
- Do customers frequently ask about color variations, materials, finishes or accessories?
- Don’t you have photos or visuals for all product combinations?
- Are the products so large, expensive or difficult to transport that photo shoots are not cost-effective?
- Do you offer personalization (e.g., printing, engraving, embroidery), the result of which is difficult to show the customer before ordering?
- Do you want to be able to add new variations or designs yourself without involving a photographer or 3D graphic designer?
If you answered “yes” at least once, chances are that the 3D configurator will make your job significantly easier – and allow your customers to make a purchasing decision faster.
Why?
Because the configurator doesn’t just show a product.
It solves specific communication problems: it eliminates ambiguities in the offer, shortens the exchange of emails for details, and allows the customer to check for himself the possibilities that previously had to be explained.
In addition, if you offer products in multiple variants, the configurator gives you full control over how the customer sees them – without having to create hundreds of photos or renders.
In short: the 3D configurator is not a gadget.
It’s a tool that relieves the burden on your sales department, increases customer engagement, and shows your product the way it really deserves to be seen.
🗂️ What do you already have to get started?
Before you start talking about implementing a 3D configurator, it’s worth taking a brief inventory of the resources you already have.
This is not a formal document, but a gathering of information in one place that will allow the contractor to understand your product and determine the scale of the project.
Start with a simple question:
“What do I know about my product and how can I show it?”
Most often, companies have at least some of the following:
- 📦 Physical products – which can be photographed, scanned or measured.
- 📐 Technical drawings – in DWG, PDF or CAD format.
- 🧱 3D models – often created by a designer or builder.
- 🎨 List of variants – colors, sizes, materials, accessories.
- ⚙️ List of accessories – interchangeable parts, additional equipment, personalization.
- 🌐 A website or online store – even if without configuration functions.
- 🧭 Visual identity principles – brand colors, product presentation, tone of communication.
These all form the basis of an implementation brief.
The better you describe what you already have, the easier it will be to adapt the tool to your situation.
You don’t have to prepare everything at once – it’s crucial that the implementation team knows what to expect.
In practice, the more materials you have at the outset, the more accurate the pricing will be and the faster the project will be launched.
Deficiencies can be made up – but good organization at the start will reduce implementation time by up to several weeks.
If you don’t have 3D models or full documentation, that’s not a problem.
All you need is to be able to show the product in pictures or in a catalog.
The rest – i.e. digitizing, modeling and optimization – is handled by the technical team.
Your data set is the starting map.
It doesn’t have to be complete – the important thing is that it is consistent.
From this point, the actual implementation process begins.
🔍 Preliminary stage – analysis and consultation.
This is the moment when the idea for the 3D configurator begins to take concrete shape.
You’ve already gathered the materials, and now it’s time to determine exactly what your configurator is supposed to do and how it will work in practice.
In this stage, the first meeting or consultation takes place, during which you:
- provide all available materials (photos, drawings, models, catalogs),
- discuss what variants or options you want to present,
- determine where the configurator should work – on the website, in the store, or as a separate application.
You don’t need to know the technical aspects.
It is the contractor who analyzes which of your materials can be used directly, and which need to be transformed, optimized or recreated in 3D.
At this stage, an implementation plan is created – the scope of the project, the technology, the estimated time and cost of implementation.
Your job is to show what you want to achieve, not how to do it.
The role of the implementation team is to turn your vision into a concrete solution.
The result of this phase is a project outline:
- initial product structure (main variants and dependencies),
- identification of data sources and files needed,
- decision on the method of integration (website, store, application),
- the schedule of subsequent stages.
This stage often ends with a simple document or sheet – this is the implementation brief, which forms the basis for further work.
If you don’t have 3D models ready, it’s okay – the contractor will help you determine what data you will need to prepare them and how best to obtain them.
A well-conducted analysis avoids problems in later phases of the project.
Instead of starting with “blind design,” you build a solution based on data and the real capabilities of your product.
🛠️ Preparatory stage – data, models and logic
This is the stage where your product really enters the 3D world.
All the previous materials – photos, drawings, lists of variants – start to form a coherent structure from which a working configurator will emerge.
The goal of this phase is to prepare three key elements:
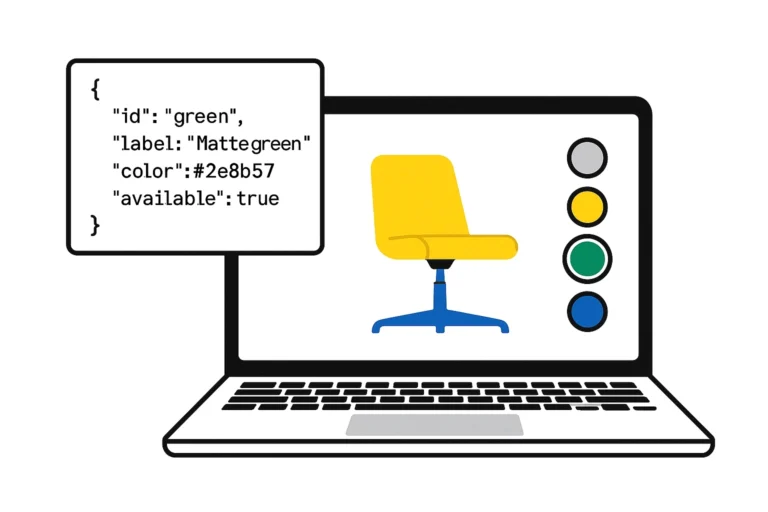
1. Product data
Here you organize all the information needed for the 3D configurator to work properly:
names of variants, relationships between options, restrictions and groups of elements.
Most often, the data goes into a sheet or JSON file, which later forms the heart of the whole system – from it the 3D configurator “knows” what can be combined with each other and what is excluded.
2. 3D models
In parallel with the data, 3D models are created or optimized.
They are the ones that will show your product in the browser in a realistic and interactive way.
Most often they are prepared in GLB format, using modern and lightweight WEBP textures.
Here it’s all about balance: the model should look good, but load quickly – even on the customer’s phone.
3. Product logic
This is the “engine” of the configurator.
It defines how the product responds to user choices:
- which colors and materials are available for a given model,
- which accessories can be added,
- what options are mutually exclusive.
Well-designed logic allows the customer to experiment, but never choose the wrong combination.
Why models and logic are created in parallel
A 3D model and its logic are two sides of the same coin.
The way the model is broken down (e.g., separate elements for accessories, material surfaces or stickers) determines what options will be available in the 3D configurator.
If the model is created first, and only then the logic – it often turns out that it needs to be reworked.
That’s why the two processes are carried out together to create a flexible, easy-to-develop system from the beginning.
This is the stage where technology and knowledge of your product must play together.
Well-designed data and models later allow you to quickly add new variants without rebuilding the entire system.
🖥️ Interface design (UI/UX)
This is the stage where your configurator starts to take on a character.
3D models and logic are already running in the background – now it’s all about how the user will use it.
A well-designed interface not only looks aesthetically pleasing, but most importantly guides the user through the configuration process:
It allows him to intuitively select options, see the effects and go back a step when he wants to change something.
This is where it is decided whether the customer will want to spend three seconds… or three minutes in the 3D configurator.
How the interface is created
UI/UX design starts with understanding the context in which the configurator will be used.
It’s a very different job if the tool is going to be part of an online store than if it’s going to be a standalone product application.
🔹 If the 3D configurator is to be part of a website or store:
The interface design is created in the context of the platform (e.g. WooCommerce, Shopify, PrestaShop).
The UI must visually match the existing visual identity – colors, typography, page layout.
At the same time, it should take advantage of what the platform already offers:
- built-in shopping cart and order process,
- product management system (CMS),
- integrations with analytics and CRM.
This way, the configurator becomes a natural part of your site, and the user doesn’t feel like he or she is “switching” to another application.
🔹 If the 3D configurator runs as a separate application:
You have more freedom in design – you can create your own layout, full-screen 3D view and custom panel layout.
But such independence also means more responsibility: you have to add elements that would be “built-in” in the store, e.g.
- A contact or quote request form,
- a mini-cart or a list of selected options,
- a panel for editing product data.
Sometimes a hybrid solution is created – the 3D application works visually independently, but uses the backend of the store (e.g. the product database and WooCommerce shopping cart).
This gives a combination of flexibility and simplicity of integration.
Key principles of good UI/UX for the configurator
- Minimalism and focus – the user is supposed to look at the product, not the interface.
- Clear labels and hierarchy of options – names that the customer understands, not technical abbreviations.
- Responsiveness – the layout must work equally well on phone, tablet and desktop.
- Immediate effect – any change (e.g., color, material) should be visible without significant delay.
- Consistency with the brand – the configurator should look like an integral part of your visual communication system.
A good interface is one that doesn’t need to be explained.
The customer simply knows where to click – and you are assured that the user experience supports your sales goal.
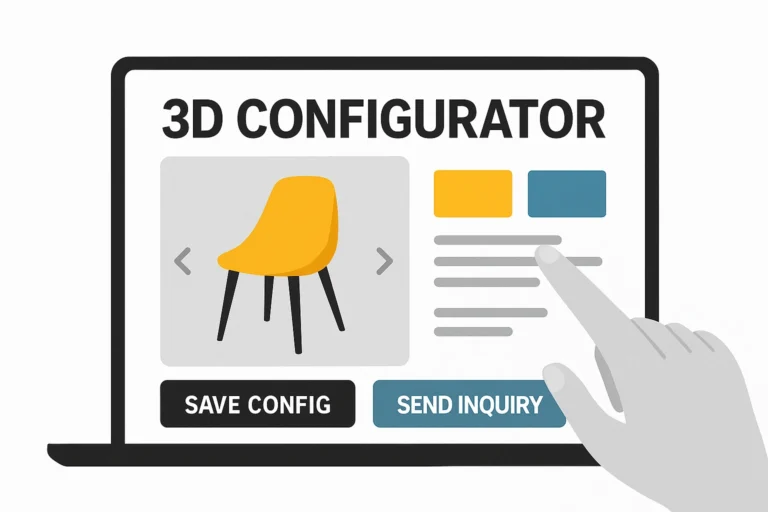
The result of this stage is a prototype of the interface, often in the form of a mockup or a clickable demo.
It’s on this that you can test how the customer will use the tool – before the final version is created.
⚙️ Programming, optimization and testing
This is the stage when your configurator really starts to work.
All the previously prepared elements – models, logic and interface – are combined into a test environment that behaves like a finished system, only without integration with your website or store yet.
The goal of this stage
The goal is to create a fully functional version of the 3D configurator or interactive presentation, running in the browser and ready for integration.
At this stage, the development team focuses on:
- implementing the logic and links between variants,
- connecting the interface to the 3D engine,
- testing the operation of the models in the web environment,
- optimizing the way resources are loaded,
- compatibility testing on different devices and browsers.
The result is a stable, fast 3D application that responds exactly as you expect – changing variants, colors, accessories and materials in real time.
Optimizing performance (not the model)
Models and textures are already prepared – what matters now is how they are loaded and managed.
At this stage, optimization is done:
- dividing resources into smaller packages loaded dynamically,
- loading elements only when they are needed (lazy loading),
- caching and preloading of the most frequently used materials,
- compression of scripts and files (gzip/br),
- efficient rendering (e.g., by LOD or reducing the number of draw calli).
These are small details that the user will never notice – but they make the configurator load faster and run smoother, even on older devices.
Quality and fluidity tests
Finally, everything is thoroughly tested.
It is checked for:
- correctness of logic and dependencies,
- responsiveness of the interface (including mobile),
- smoothness of operation under various network conditions,
- behavior at low hardware performance.
The goal of testing is not just to confirm that it “works.”
The goal is to make sure it works comfortably and predictably for the user.
This stage ends when the configurator works perfectly on its own – no errors, no delays, fully responsive.
Only then does it move on to the next stage: integration with your website or store.
🔗 Integration and publishing
This is the moment when the configurator comes out of the testing environment and into the real world – on your website or sales platform.
From now on, users can use it just like any other feature of your site.
At this stage, we are no longer building anything from scratch – rather, we are combining the elements that were previously created: the 3D application, the logic, the interface and the environment in which the configurator will operate.
The goal of the stage
The goal is to fully embed the configurator into your company’s existing ecosystem.
The implementation team makes sure that it works flawlessly in the context of your website, store or CRM system.
In practice, this means:
- implementation of the configurator in the target environment (e.g. WordPress, Shopify, dedicated CMS),
- adjusting the size and styles to fit perfectly with the site layout,
- connection to the inquiry system, shopping cart or pricing module,
- integration with analytical tools (e.g. Google Analytics, Meta Pixel),
- final testing under real web conditions.
The goal is not just “to make it work,” but to make it work exactly where your customers already are – with no slowdowns, errors or differences in design.
What the integration process looks like
First, the configurator is embedded in the site environment.
If you’re using an off-the-shelf e-commerce platform, it’s usually an iframe module, plugin or component embedded in the product code.
In the case of custom solutions – the integration is done through a dedicated script or API.
Next, it is checked whether:
- the configurator does not affect the page layout (e.g. margins, headers, sticky-menus),
- CSS styles from the theme do not adversely affect the theme’s design,
- the data (e.g., selected options, price, product ID) is correctly transferred to the store system or form,
- everything works under the same conditions as your site: on different devices, resolutions and Internet speeds.
Final testing and publishing
After embedding, a series of acceptance tests follows – first internally, then on the client side.
Stability of operation, fluidity, data correctness and user experience are checked.
Minor visual or textual corrections (e.g., option names, button labels) can still be made without disturbing the logic of the system.
Only after everything is approved is the configurator made available to the public.
From that moment on, it becomes part of your online offering – it works 24/7, presenting the product in a consistent, interactive and engaging way.
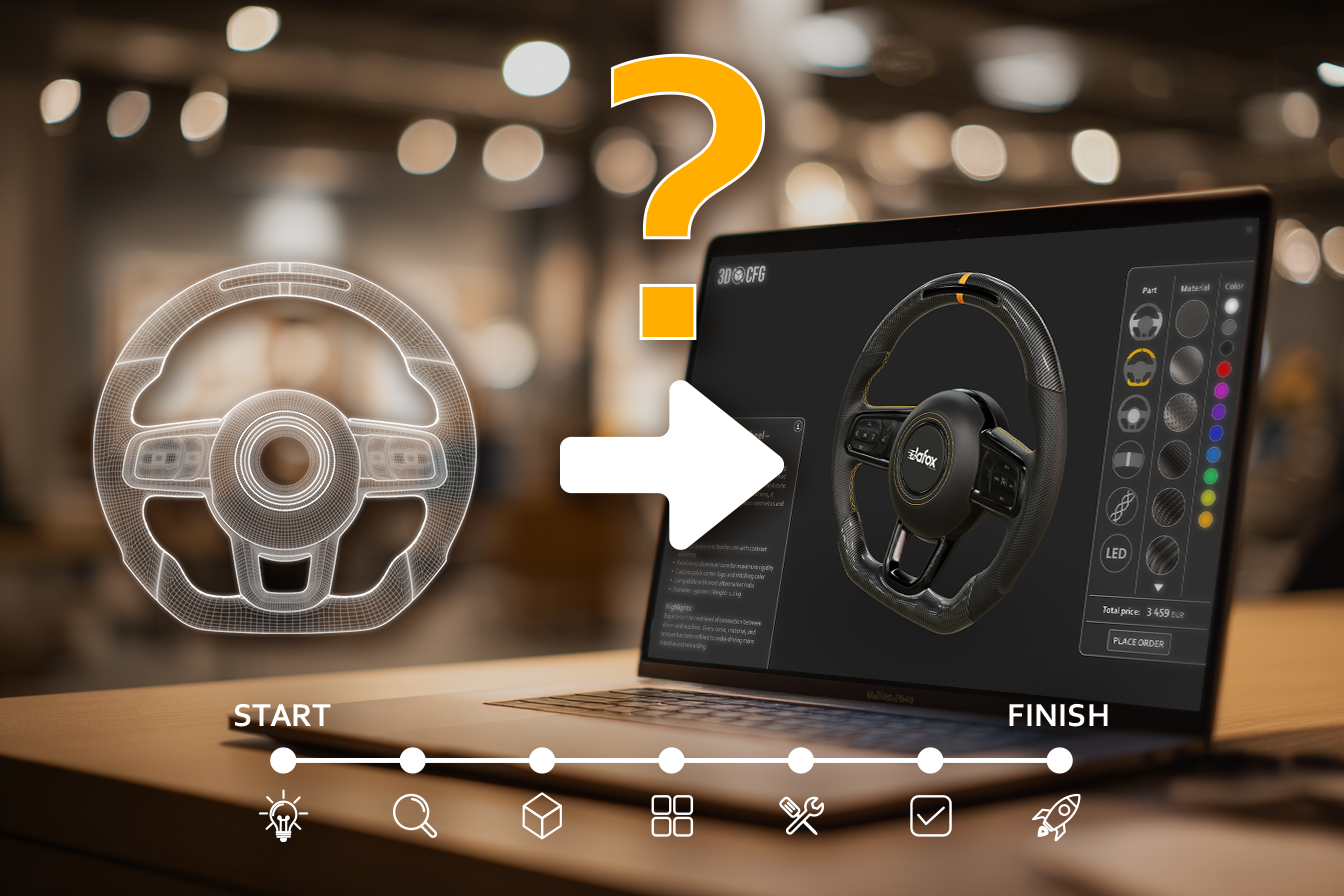
The integration stage is like installing a finished engine in a car.
All the mechanics are already in place – now it’s just a matter of making it fit perfectly with the body and styling of your brand.
🚀 Maintenance and development
Implementing a 3D configurator doesn’t end a project – it’s just the beginning of its life.
Just as a physical product needs maintenance, updates and new variants, the configurator needs systematic care to keep it running smoothly, compatible with browsers and responsive to changes in your offerings.
Why you should plan for maintenance
3D technology in browsers is evolving rapidly.
New versions of browsers, libraries or mobile systems can affect the way your application works.
Regular maintenance avoids a situation where something “suddenly stops working” or loads slower than it used to.
That’s why it’s a good idea to schedule recurring maintenance activities after publication, such as:
- testing after browser updates,
- refreshing textures, models or materials,
- minor tweaks to the interface,
- control of analytics (e.g., how many people complete the configuration, which variants are most frequently selected).
Regular maintenance is not a cost, but a guarantee that the tool you have already invested in will always work just as well.
Development and expansion
The configurator can evolve along with your offer.
If you introduce new variants, colors or accessories – just add them to the data structure, without having to create a new application.
Similarly, you can develop the interface itself, for example, by:
- language versions
- AR (augmented reality) mode,
- configuration saving and e-mailing,
- integration with a customer database (CRM),
- an automatic quotation module or generation of a PDF with the configuration.
Thus, the configurator not only presents the product, but becomes an active part of your sales process – from interest to finalization.
Post-implementation cooperation models
If you don’t have an in-house technical team, you can set up monthly or quarterly support packages with the contractor, including, for example:
- a certain number of hours for updates and patches,
- ongoing performance monitoring,
- performance and user behavior reports.
Such a solution allows you to plan your budget and be sure that your system is always running at the highest level.
3D Configurator is a long-term investment.
The more you take care of it, the better it works for you – generating interest, inquiries and sales.
It’s a tool that grows with your offer.
✅ Summary
The process of implementing a 3D configurator is not only a technical step, but also a way to organize knowledge about your products.
From the first analysis to publication, every step matters: it helps you understand what customers really want to see, and how you can show it to them in a simple, attractive way.
A well-planned configurator is not an add-on to your website, but a tool that supports sales, marketing and customer service.
It allows you to shorten communication, reduce the number of requests for details and build a professional brand image.
The better you design the process at the beginning, the more it will pay off in the future – in the form of greater customer engagement and more efficient sales.
Wondering what such a process could look like in your company?
You can start with a simple step – checking what data and materials you already have about your products.
Based on this, you can estimate the scope of work and design a configurator tailored to your industry, product and sales method.
👉 If you want to talk about the possibilities of implementing a 3D configurator in your company, you can contact us through the form on the site or just e-mail us.
We will be happy to help you choose a solution that will best meet the needs of your customers.